
UE5 C++ Project
Project Soccer
Overview
I was trying to make a soccer game somewhere in between Super Mario Strikers Charged and EA FC25’s Rush mode while learning about game AI and making tools in Unreal Engine 5.
This project is no longer in development, but I wrote a technical overview of the project below, and the source code can be found on GitHub using the link on the right.
AI Behavior
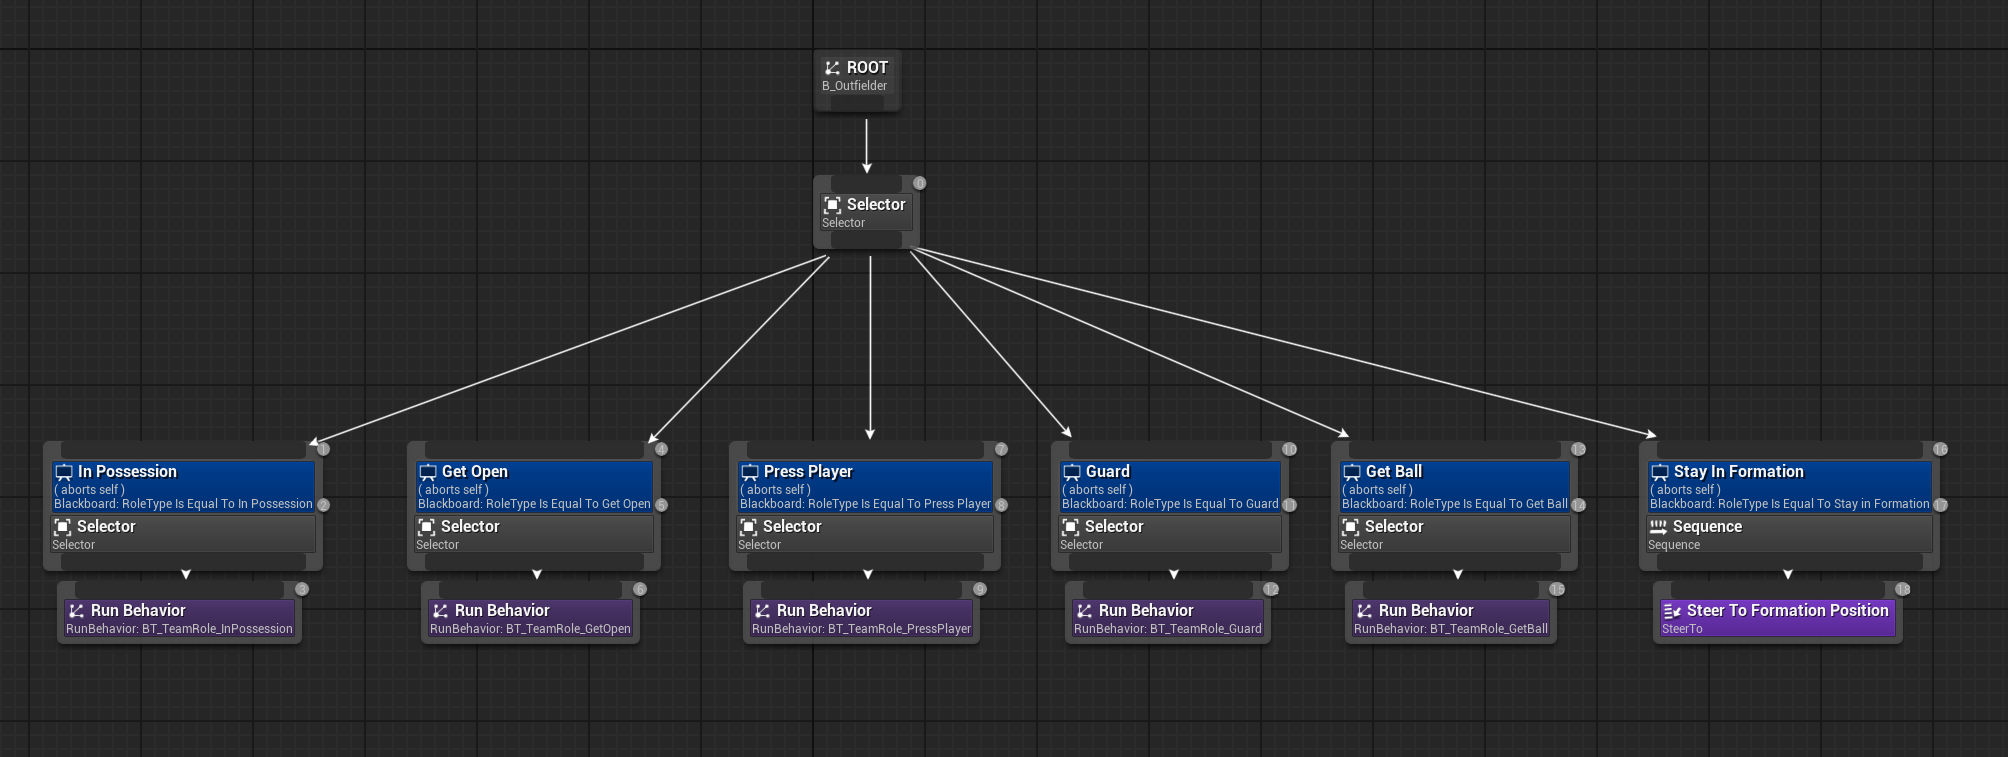
The AI is run at two levels: Outfielders are given roles through the Team Manager using a Utility Theory model, and then the Outfielders execute those roles within a Behavior Tree.
To put it another way: the Team Manager acts as the coach on the touch line watching the players and the opposition, then gives the players instructions on how to act. It is then up to the players to execute the coaches orders.
Building Context through the Field State
In order for the Team Manager to make the most informed decisions possible, I created a FieldManager class to calculate the most important game data frame to frame. This includes an Influence Map to guide steering behavior of the players and distance relations to other players and the ball. If the AI needed to query something about the current state of the game, it was going to be calculated in and stored in the Field State.
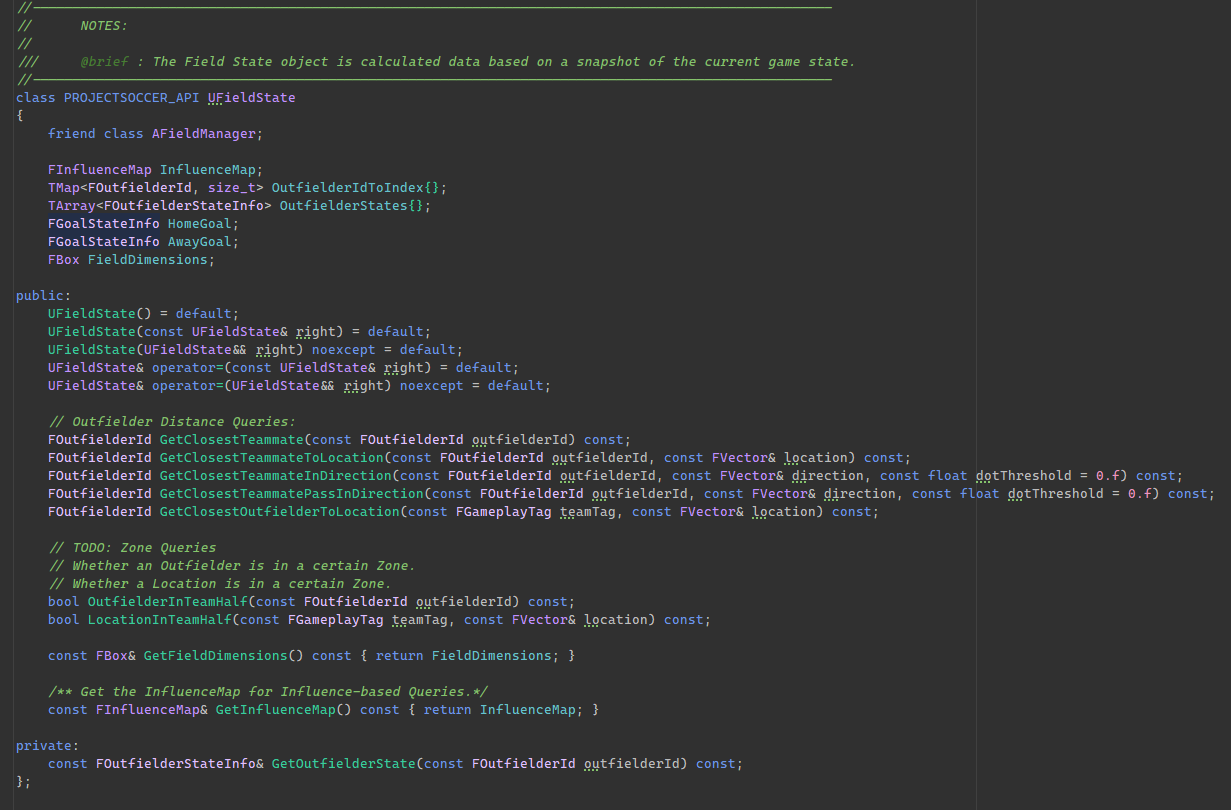
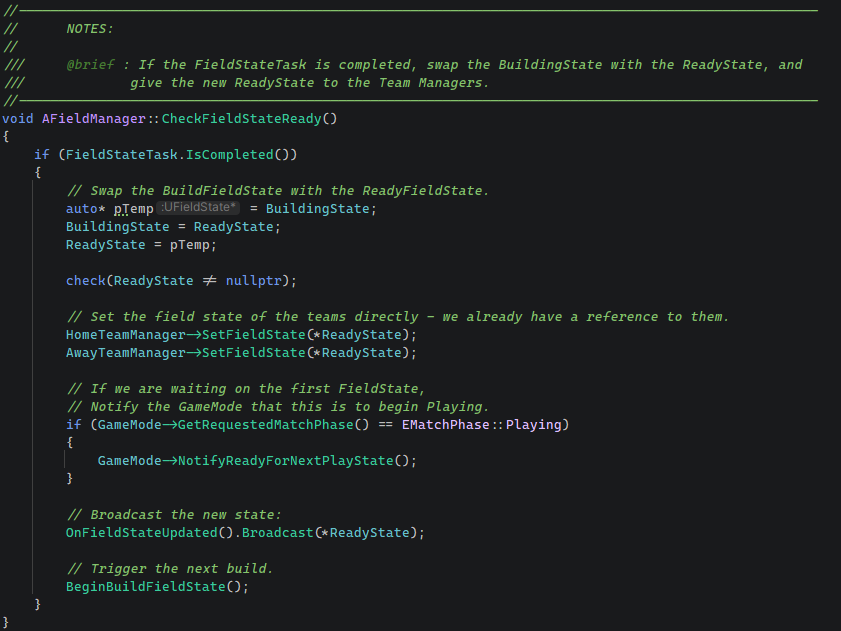
The FieldManager maintain two FieldStates objects: one that was being calculated, and one that was ready to go; similar to a double buffer setup. It would take a ‘snapshot’ of the field, which included each outfielder position and the ball position, and then launch an async task to crunch the data on a separate thread. Every Tick it would check if the field state was ready to give to the two TeamManagers, and if it was, it would swap the ‘building’ state with the ‘ready’ state, then start the process again. This offloaded the expensive influence map calculation outside of the main loop, and sped up environment queries by caching the most pertinent data.
Determining Roles, powered by Data
On every tick of the TeamManager (which is not every frame), it will reassign all of their Outfielder roles based on the current state of the game.
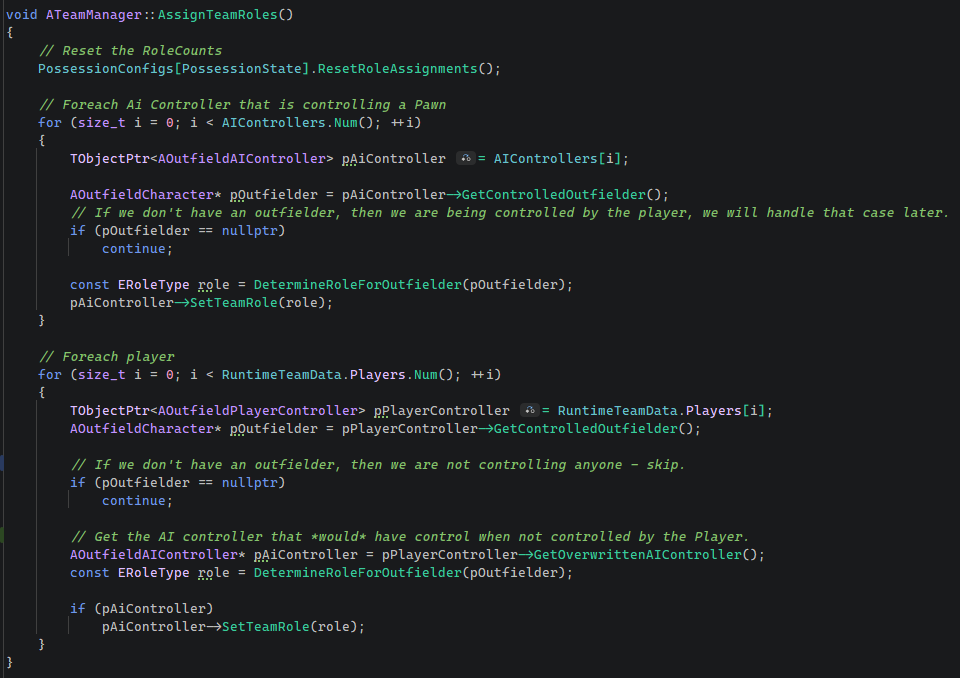
Each role in the team has a maximum number of players that can be assigned to the role and can be scored to determine the best fit for each player on the team.
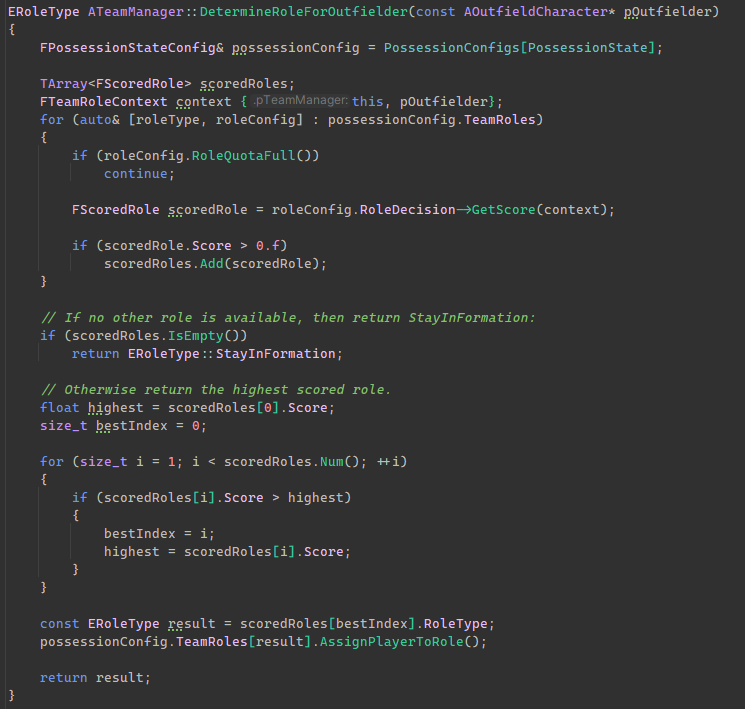
Roles scores are determined through ‘Decisions’ and ‘Considerations’. A Decision has a role associated with it, and a number of Considerations that must be processed to get an overall score. For example, if we are in possession and want to know if the Outfielder should be trying to get open for a pass, we check if the ball is in the opponent’s half. The Decision is to determine if the ‘GetOpen’ role should be assigned to the Outfielder, and the Consideration is checking if the ball is in the opponent’s half.
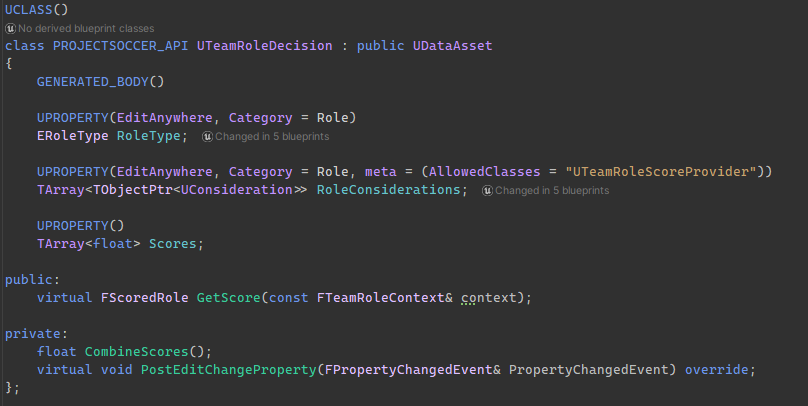
Each Decision and Consideration is data driven using Unreal’s UDataAsset class. Programmers can write the Consideration logic, and Designers can assemble the logic into Decisions for the Team Manager to process.
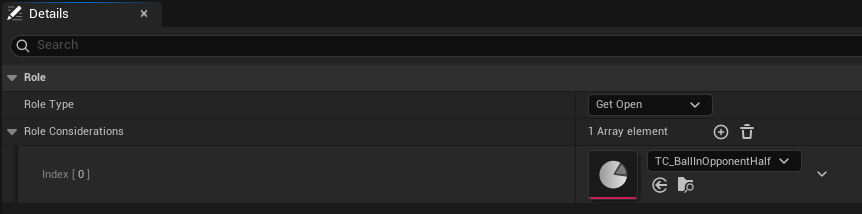
Each of these decisions are also split up based on the possession state of the team, so that when you have the ball, you are making more offensive decisions, without the ball more defensive, etc.
Outfielder Behavior - Simple but Effective.
The actual Behavior Tree for the Outfielders was fairly simple. The main tree selected from a set number of behaviors based on their given roll, and then the sub tree was executed.
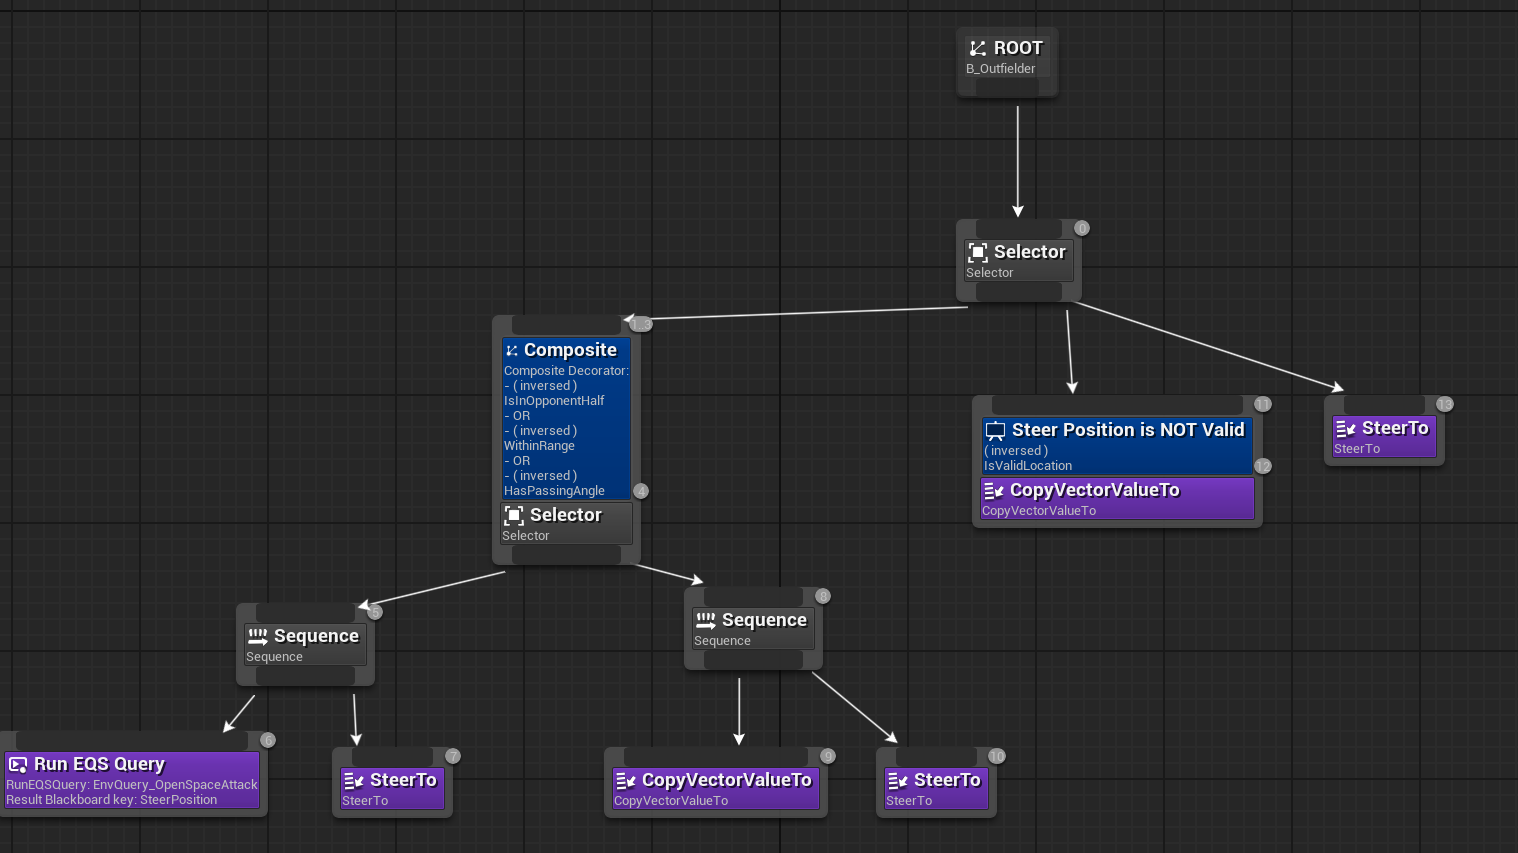
I used the EQS system to create custom queries and contexts that could use the field state to drive different behaviors. The important part is that the players were acting on already calculated data through the field state. Here is an example of the GetOpen behavior:
Debug Views
As I was developing this project, I added debug visualizations for different features or behaviors of the AI that I was testing: formation position markers, passing lines, the influence map data, etc. Eventually it became cumbersome to toggle the different visualizations that I wanted to have active in the scene, I decided to centralize the code into ‘Debug Views’.
Creating Debug Views
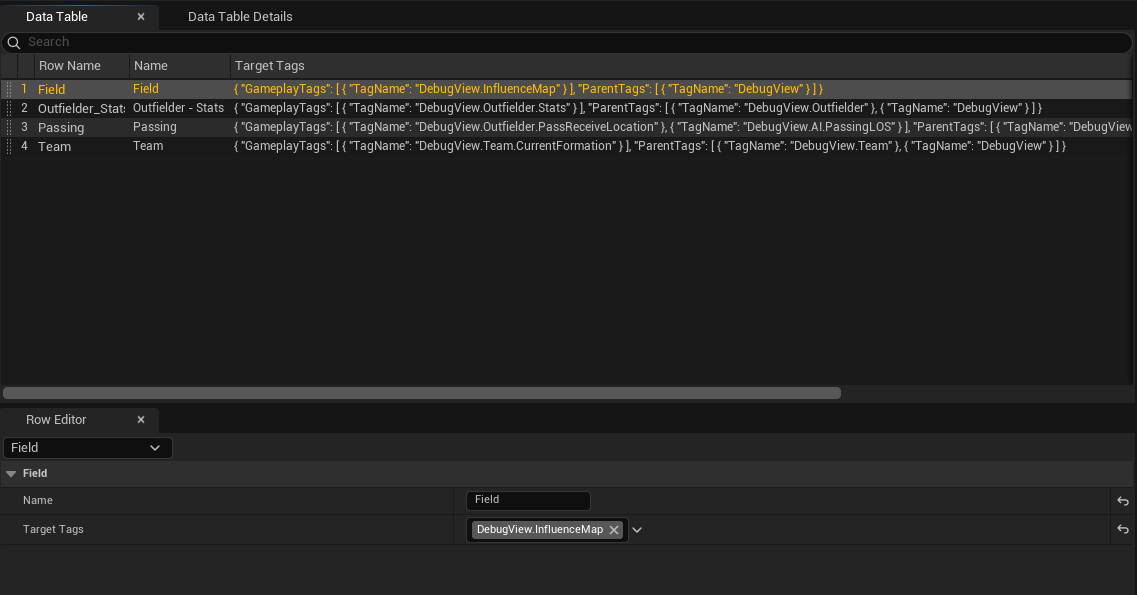
A Debug View is a essentially a collection of tags. A programmer can define a Debug View Target Tag in code, which was just an Unreal Gameplay Tag in disguise, and then a designer could use that tag to add that debug element to a particular view.
For example, I created a tag for ‘Passing Line of Sight’ and ‘Passing Recieve Locations’. If enabled, they would draw debug lines between outfielders and a debug sphere for the passing target location respectively.
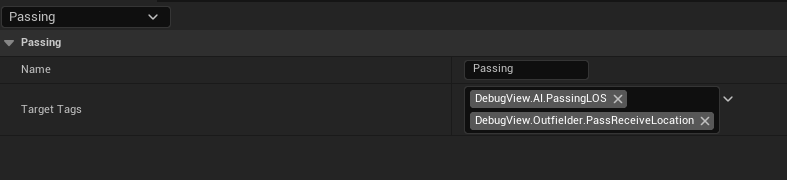
Then, in the Debug View Data Table, those tags were both added to a ‘Passing’ Debug View that can be enabled or disabled in game.
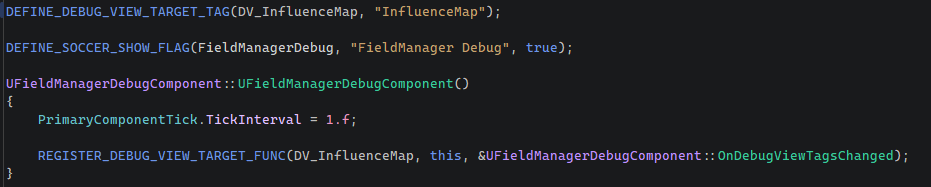
An Example in Code
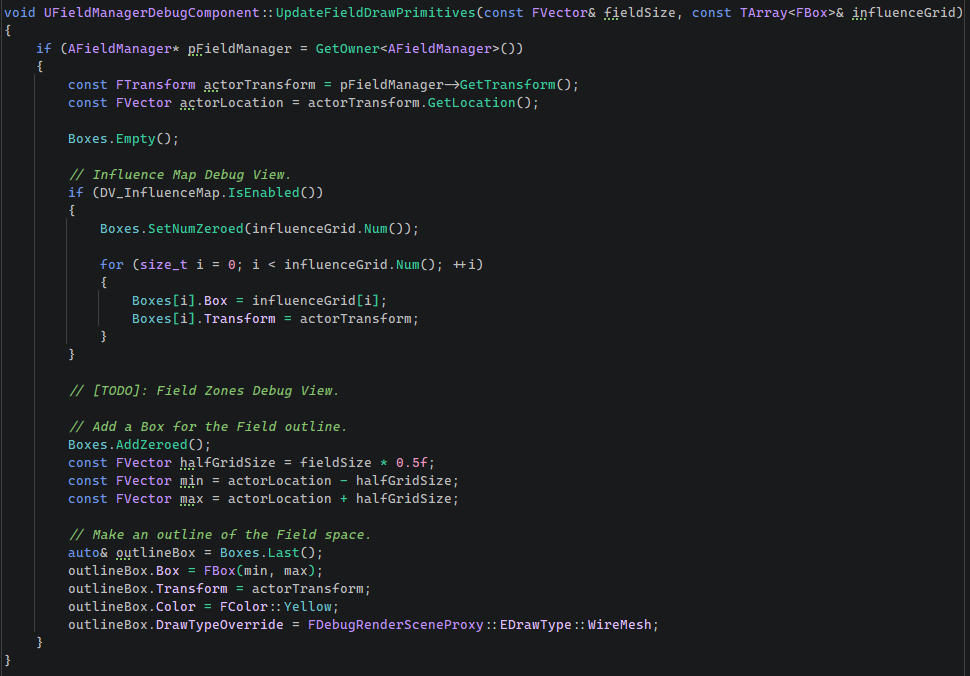
This is how I set up the Influence Map’s visualization using the Debug View Target Tags. First, I define an Influence Map so that it can be used and discovered using the macro DEFINE_DEBUG_VIEW_TARGET_TAG
I also register a callback in the debug component’s constructor that will be invoked any time the tag’s active state changes, which is whether the tag is active in the current Debug View. REGISTER_DEBUG_VIEW_TARGET_FUNC takes in a reference to the tag variable and the function to invoke.
In this case, when UFieldManagerDebugComponent::OnDebugViewTagsChanged is invoked, it rebuilds an array of FDebugRenderSceneProxy::FDebugBox that is added to the debug scene proxy.
You can also query the state of Debug View Target Tag using the variable directly.